
Christmastime is almost here, and while it is the beginning of the month yet, this is the prime-time to start your baking adventure for the holidays! I don’t know about you, but around this time of the year, I like to pretend that I lost about twenty years and I decide to fully embrace the magic of the season. Starting with baking what turns out to be more than what most people consider to be humanly-possible.
And as you might imagine, when I think about my Christmases as a child, I think about the cookies. Of course there are the classics- buckeyes, lady locks, (maybe pizzelles if you grew up in Pittsburgh like I did). But there is one cookie that really takes me back.
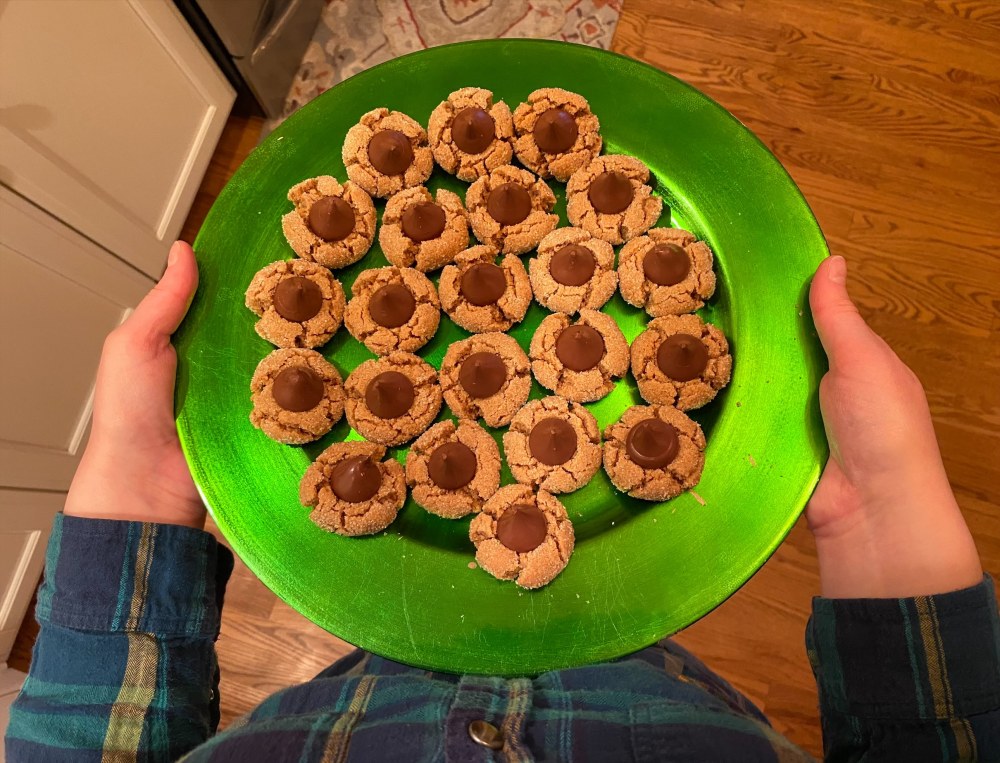
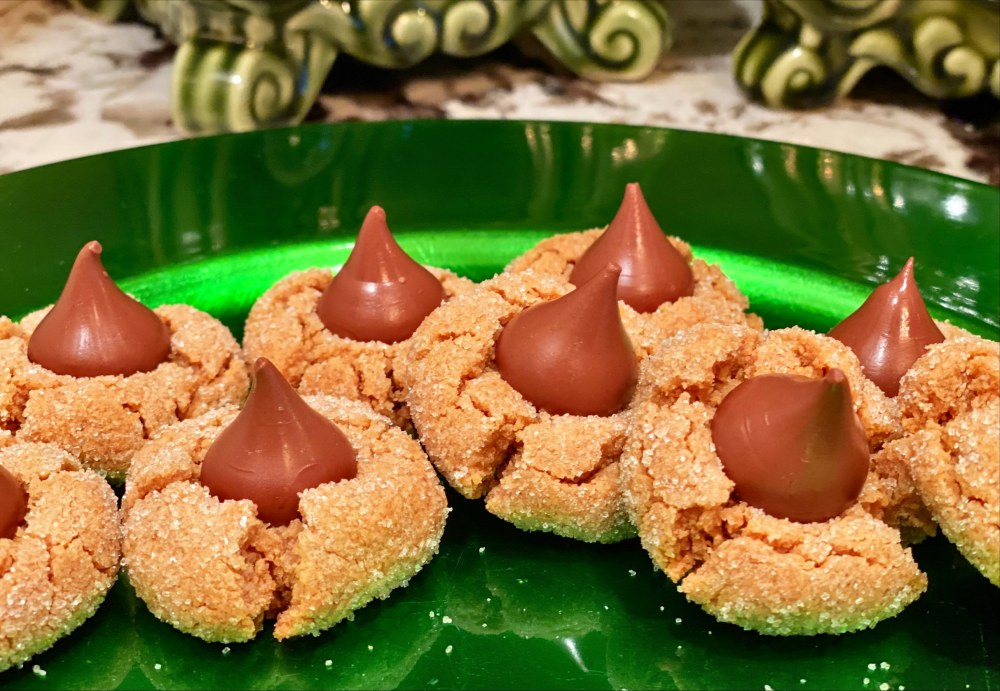
Hence, I bring you the dream cookie of your childhood: the Peanut Butter Blossom (AKA, the Hershey Kiss Cookie), only in its almighty gluten-free form.

Photogenic? Yes. Gluten-free? Check. Freaking awesome? Absolutely.
I will say that for this recipe, as well as my buckeye recipe, you have to use the regular Jif peanut butter, not the natural kind! This includes Jif Naturals. Not sure why, but the consistency tends to be too oily or something and it does not turn out as well. Also, just use Jif. Sorry Eric. I mean, come on- Peter Pan?
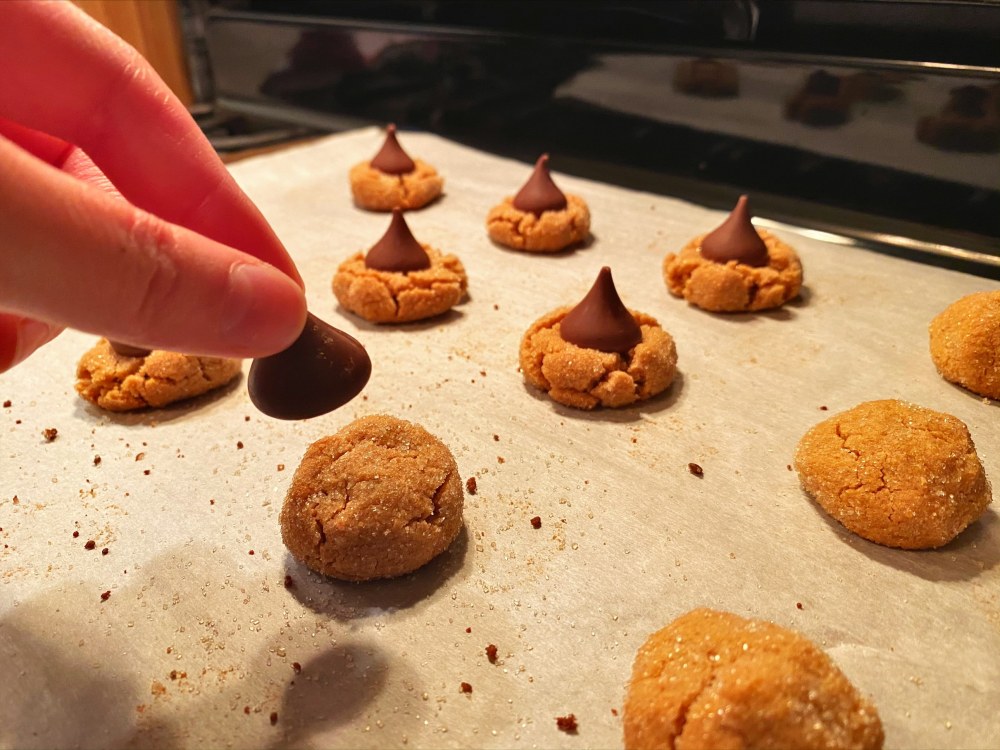
I whipped up this recipe in my own test kitchen, and while it is pretty self-explanatory, I would like to point out the great importance of refrigerating your Hershey’s kisses.
Your peanut butter bases will come out of the oven pretty toasty. Cold Hershey’s kisses ensure that the bottom of your kiss will melt first to bond itself to the cookie, and the rest will melt at a much slower rate to maintain its lovely shape.
If you dare decide to just plop a room temperature kiss on one of them, they will melt and lose their classic kiss shape! Don’t let you Christmas cookie platter be ruined by Hershey’s kiss puddles. Refrigerate your kisses, today!
Hershey Kiss Cookies (Peanut Butter Blossoms)
Written by The Wildflour
Yields about 3 dozen cookies
Prep time: 25 min
Cook time: 30 min total
1/2 c Bob’s Red Mill 1:1 Gluten-Free Baking Flour
1 c light brown sugar
1 tsp baking powder
1 1/4 c Jif peanut butter **The natural kind does not work.
1 egg
1 tsp pure vanilla extract
1/2 c granulated sugar for rolling
1 bag of Hershey’s Milk Chocolate Kisses
- Preheat oven to 350 degrees Fahrenheit. Line a baking sheet or two with parchment paper.
- Unwrap your Hershey’s kisses (about 36 or so), and place on a plate in the refrigerator.
- Combine peanut butter, brown sugar, vanilla, and egg in large bowl.
- Mix together the gluten-free flour and baking powder in separate bowl.
- Slowly add the flour mixture to the wet ingredients, scraping down the sides of the bowl.
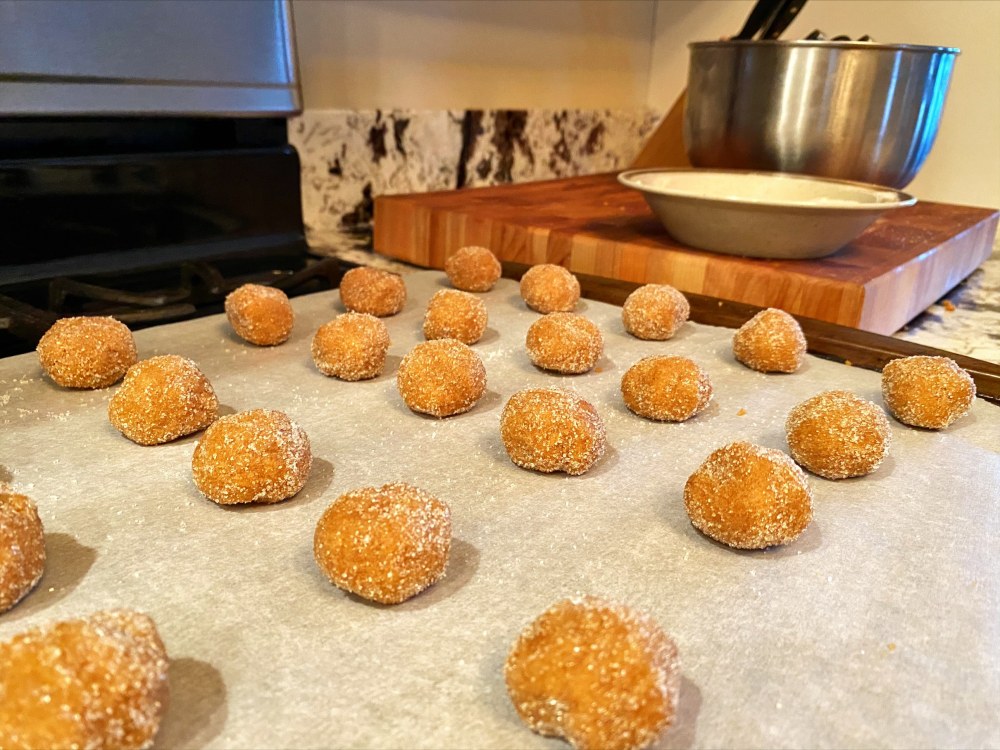
- Refrigerate dough for 5 minutes to help it solidify. The dough will be slightly crumbly, but it will come together when squished a few times.
- Roll dough into 1 inch balls, then toss them in the granulated sugar before placing onto your parchment-lined baking sheet.
- Bake for 11-12 minutes, or until the balls began to have a crackled appearance.
- Remove the crackly puff balls from the oven and *gently* press a chocolate kiss on top of each peanut butter ball. The cookie will crack even more, so do not be discouraged if you are only able to press the kiss into it a little bit. The chocolate will melt along the bottom from the heat, thereby sealing it into place.
- Carefully transfer to a wire cooling rack. Once cooled, place cookies in fridge for the chocolate kisses to solidify on top of their cookies. Once hardened, the are ready to enjoy or to be frozen until December 25th.
